West Palm Beach winters are mild enough that most homeowners never think twice about their AC systems once the temperatures dip into the 60s. That's a costly mistake. Your high-efficiency AC runs hard for nine or ten months a year in South Florida, and skipping seasonal care during those cooler months sets you up for surprise breakdowns and reduced performance right when you need cooling the most. The good news is that proper winterization is straightforward, takes just a few hours, and can protect your investment for years to come.
Table of Contents
- What you need to winterize your AC
- Step-by-step guide to winterizing your AC
- Troubleshooting common winterization mistakes
- How to verify your AC is ready for spring
- Our perspective: Why most AC winterization guides get it wrong
- Get expert help with AC maintenance in West Palm Beach
- Frequently asked questions
Key Takeaways
| Point | Details |
|---|---|
| Skip full covers | Fully covering your AC can trap moisture and attract pests, so stick with cleaning and light protection. |
| Regular cleaning is key | Simple seasonal cleaning and inspection help prevent costly springtime repairs and keep your AC running efficiently. |
| Follow expert advice | Trust guidelines from manufacturers and HVAC professionals, not outdated myths about AC winterization. |
| Verify before spring | Always check your AC for debris or damage as temperatures rise to ensure optimal performance. |
| Get local support | Professional services in West Palm Beach make AC maintenance worry-free and help maximize your system's lifespan. |
What you need to winterize your AC
Before diving into the step-by-step process, let's get clear on what you'll need for safe, effective AC winterization. You don't need expensive specialty tools. What you do need is the right information, because one of the most common mistakes homeowners make is buying a product they don't actually need.
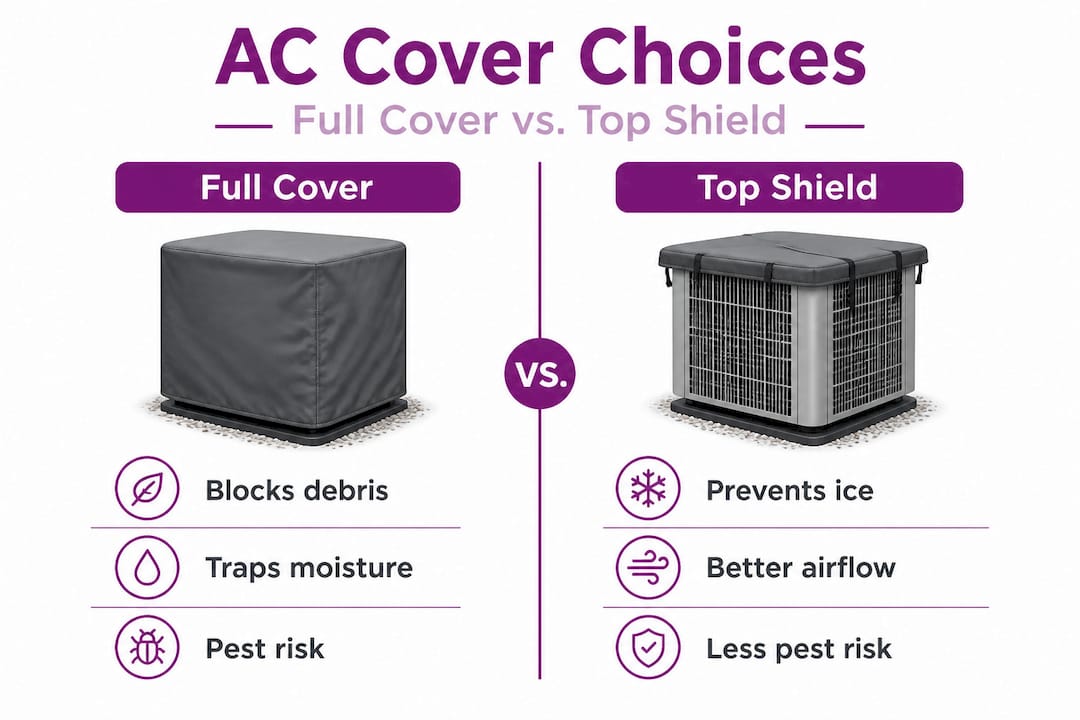
Many people head to the hardware store and pick up a full AC cover, thinking they're protecting their unit. Here's the truth: experts and manufacturers recommend cleaning and inspection over full covers. A full cover traps moisture inside the unit and creates a cozy home for pests like mice and insects. Instead, focus on cleaning supplies and a solid inspection routine.
What you'll actually need:
- A garden hose with a standard nozzle
- Mild detergent or a foaming coil cleaner
- Soft cloths or a soft-bristle brush
- A screwdriver (for removing the access panel)
- A flashlight for inspecting internal components
- A fin comb (optional, for straightening bent aluminum fins)
- A notepad or your phone for logging what you observe
- A quality HVAC maintenance checklist to stay organized
One thing you'll notice is missing from that list: a full-unit vinyl cover. If you already own one, set it aside. You can use a piece of plywood or a mesh cover to block falling debris from above, but the sides of the unit need airflow to prevent moisture buildup.
Here's a quick comparison to help you decide what type of protection makes sense for your outdoor unit:
| Protection type | Pros | Cons | Recommended? |
|---|---|---|---|
| Full vinyl cover | Blocks all debris | Traps moisture, attracts pests | No |
| Top-only cover or plywood | Blocks falling leaves and debris | Minimal protection on sides | Yes, in moderation |
| No cover at all | Maximum airflow, no moisture risk | Debris can accumulate inside | Yes, with regular cleaning |
| Mesh cover | Allows airflow, blocks large debris | Less protection from heavy debris | Yes |
The bottom line is simple: cleaning your AC thoroughly before and after winter does far more good than any cover ever could.
Step-by-step guide to winterizing your AC
With your supplies ready, here's the proven process to winterize your AC and avoid common homeowner mistakes. Follow these steps in order for the best results.
-
Turn off the power to the outdoor unit. Locate the outdoor disconnect box near your condenser unit and switch it off. This prevents the system from accidentally kicking on during a warm winter day. Running your AC when temperatures are below 60°F can damage the compressor.
-
Clear the area around the unit. Remove any leaves, branches, grass clippings, or other debris within two feet of the unit. Overgrown shrubs and plants can restrict airflow and hold moisture against the cabinet.
-
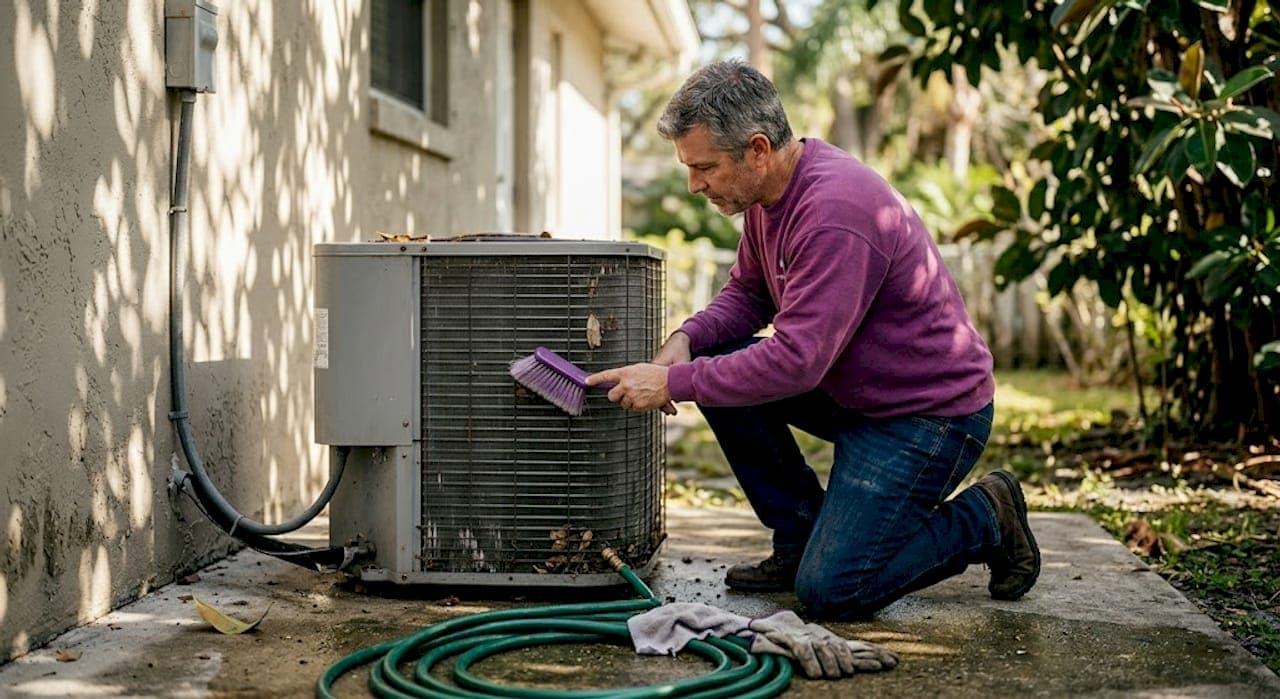
Clean the exterior coils. Use your garden hose to rinse the condenser coils from the inside out if possible, or spray gently from the outside. Apply a mild detergent or coil cleaner, let it sit for five minutes, then rinse thoroughly. This removes dirt and grime that reduces efficiency. For a more detailed walkthrough, check out our guide on proper AC cleaning.
-
Inspect the fins. The aluminum fins surrounding the condenser can bend over time, blocking airflow. If you see bent fins, use a fin comb to straighten them carefully.
-
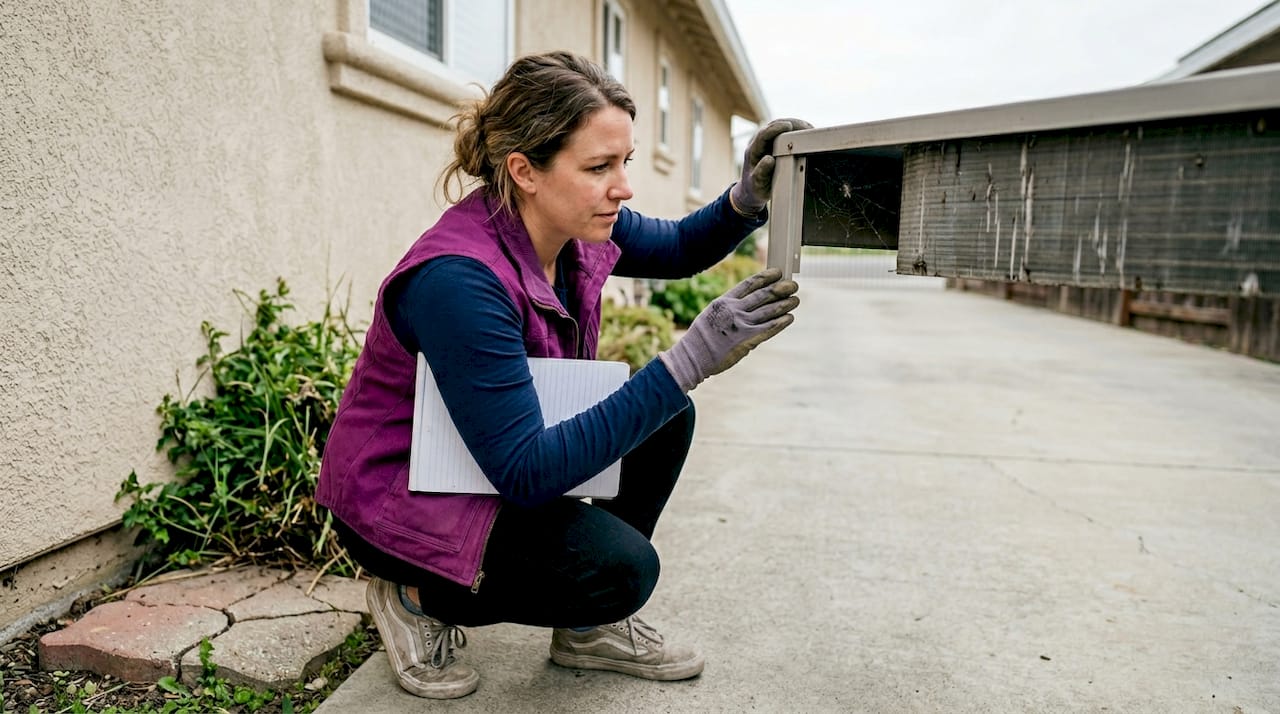
Check for visible damage or refrigerant leaks. Look for oil stains around refrigerant lines, corrosion on the cabinet, or any components that look cracked or worn. These are signs you'll want a professional to evaluate before spring.
-
Check the condensate drain line. This small pipe removes moisture from your system. If it's clogged, water can back up and cause damage. Pour a cup of diluted bleach through it to keep it clear.
-
Place a top-only barrier if desired. A piece of plywood or a mesh top cover can keep leaves and debris from falling directly into the unit. Do not seal the sides.
-
Log your observations. Write down anything unusual you noticed during the inspection. This record becomes valuable when you schedule your spring checkup.
"Covering your AC unit completely is one of the most well-meaning but counterproductive things a homeowner can do. HVAC professionals consistently see more damage from trapped moisture and pests in covered units than in units left open to breathe." — HVAC experts and manufacturers
Pro Tip: If you're unsure whether DIY vs professional AC maintenance is right for your situation, a good rule of thumb is this: cleaning and visual inspection are DIY-friendly, but anything involving refrigerant, electrical components, or internal parts should go to a certified technician.
Here's a quick reference for how often each task should happen:
| Task | Frequency | DIY or Pro? |
|---|---|---|
| Exterior coil cleaning | Twice a year | DIY |
| Debris clearing | Monthly | DIY |
| Refrigerant level check | Annually | Pro only |
| Electrical connections check | Annually | Pro |
| Condensate drain flush | Every 3 months | DIY |
| Full system inspection | Annually | Pro |
Troubleshooting common winterization mistakes
Even when following instructions, homeowners often make preventable mistakes. Let's see what those are and how to avoid them.
Mistake 1: Covering the unit too tightly. This is the most common error we see. A fully covered unit holds moisture against the metal components. Over a few weeks, that moisture leads to rust and corrosion. It also gives rodents a warm, sheltered spot to nest. Lennox and other top manufacturers caution against full covers specifically because of these real-world outcomes.
Mistake 2: Skipping the cleaning step. Some homeowners assume that because the AC isn't running in winter, it doesn't need attention. But dirt and debris that sit on coils all winter can harden and become much harder to remove by spring. Starting the season with dirty coils means your system works harder and uses more energy from day one.
Mistake 3: Ignoring small signs of damage. A tiny oil stain near the refrigerant line or a slightly bent fin might seem minor. Left unchecked through winter, these small issues can grow into expensive repairs. Use your winterization inspection to catch them early. Consider pairing your inspection with smart HVAC upgrades that help you monitor your system's health throughout the year.
Mistake 4: Forgetting indoor air quality during winter. West Palm Beach winters mean you're still running your system periodically for dehumidification and occasional warmth. Neglecting your air filter or indoor components while focusing only on the outdoor unit is a missed opportunity. Check out our tips on preparing for cold season to keep your indoor air healthy even during the cooler months.
Mistake 5: Trusting outdated advice. The idea that you should always cover your AC in winter has been passed down for generations. It made more sense decades ago when AC units were less weather-resistant. Modern high-efficiency units are built to handle outdoor conditions year-round. Manufacturer guidance has evolved, and your maintenance approach should too.
Pro Tip: Take photos of your unit before and after winterization. This gives you a visual baseline so you can easily spot any changes or new damage when you return to the unit in spring.
Here's a quick checklist to avoid the most common errors:
- Never seal all four sides of the unit with a cover
- Always clean coils before leaving the unit for the season
- Inspect and log any visible damage or wear
- Flush the condensate drain line before winter
- Replace your air filter at the start of winter and again in spring
- Don't skip the spring startup inspection just because winter was mild
How to verify your AC is ready for spring
Once winter is over, here's how to confirm your AC is ready to deliver peak cooling performance for the new season.
-
Remove any debris that accumulated over winter. Even without a cover, leaves and twigs can collect around and inside the unit. Clear everything within two feet of the cabinet and remove anything that fell through the top grille.
-
Inspect for moisture damage or pest activity. Look for rust spots, chewed wires, or nesting materials inside the unit. If you find signs of pests, call a professional before turning the system on.
-
Restore power to the outdoor disconnect. Flip the disconnect box back on and give the system 24 hours before running it. This allows the crankcase heater (a small heater inside the compressor) to warm the oil and protect the compressor on startup.
-
Turn the system on and listen carefully. Run it for 10 to 15 minutes. Listen for unusual sounds like rattling, grinding, or hissing. Check that cool air is flowing from your vents.
-
Check airflow and temperature differential. Place a thermometer at a supply vent and a return vent. The air coming out of the supply should be 15 to 20 degrees cooler than the air going in. A smaller gap may indicate a refrigerant or airflow issue.
-
Schedule a professional spring tuneup. Even if everything seems fine, a certified technician can catch what you can't see. They'll check refrigerant levels, test electrical components, and verify your system is operating at peak efficiency.
Statistic callout: Proper winterization and regular cleaning can meaningfully extend your AC's lifespan, helping you get the most out of your investment before a replacement becomes necessary. For homeowners thinking about an upgrade, our guide on getting ready for spring walks you through when replacement makes more sense than repair.
If you want to be thorough, use a home buyer's HVAC checklist as your spring startup guide. It covers everything from filter condition to thermostat calibration in a simple, organized format.
Our perspective: Why most AC winterization guides get it wrong
While the step-by-step guide covers the how-to, we want to share what years of hands-on experience and manufacturer evidence reveal about winterizing your AC in South Florida.
Most guides written for a national audience assume you're dealing with freezing temperatures, heavy snowfall, and months of complete system shutdown. That's simply not our reality here. In West Palm Beach, your AC might still run a few days every week in January. The outdoor unit never fully "rests" the way it would in Minnesota. That changes everything about how you should approach winterization.
The cover myth is the clearest example of advice that doesn't translate to our climate. Manufacturer guidance is rooted in field-tested results, not marketing trends, and it consistently points away from full covers. Yet the advice keeps circulating because it feels intuitive. Covering something protects it, right? Not when that cover traps humidity in a climate where relative humidity rarely drops below 60 percent, even in winter.
What actually protects your system here is consistent, light maintenance. Cleaning the coils twice a year. Keeping the area around the unit clear. Flushing the drain line. Catching small issues before they grow. These habits, not products, are what extend the life of your equipment.
We also see homeowners invest in Lennox expert guidance and high-efficiency equipment, then undermine that investment by skipping basic seasonal care. A high-efficiency system is only as good as the maintenance it receives. The efficiency ratings on your equipment assume it's clean, clear, and properly serviced.
Our honest take: stop looking for a product to solve a process problem. Winterization is not about buying the right cover. It's about doing the right things at the right time.
Get expert help with AC maintenance in West Palm Beach
You've got the knowledge to handle the basics, and that's a great start. But sometimes you want a professional set of eyes on your system, especially before the heat of summer arrives and your AC is running full time.

Our certified technicians at Air Squad are ready to help West Palm Beach homeowners get the most out of their AC systems, season after season. Whether you need a thorough AC maintenance service to prepare for the cooling season, a quick diagnostic from our AC repair experts, or you're curious about upgrading to Lennox Healthy Climate Solutions for better indoor air quality, we're here for you. We treat every customer like family, and we back our work with honest advice and quality service. CALL TODAY to schedule your seasonal maintenance and start the year with confidence.
Frequently asked questions
Should I cover my AC unit in winter?
Most experts and manufacturers recommend against full covers, as sealing the unit traps moisture and creates ideal conditions for pests to nest inside your system.
What maintenance should I do before winter?
Clean the exterior coils, clear debris from around the unit, inspect for visible damage, flush the condensate drain, and turn off the disconnect to prevent accidental cold-weather operation.
Can improper winterizing damage my AC?
Yes, over-covering or skipping cleaning can lead to moisture buildup and pest damage, both of which can result in costly repairs when you restart the system in spring.
Do I need professional AC winterization?
Basic steps like cleaning and debris removal are DIY-friendly, but a certified technician can spot issues you might miss and verify that regular maintenance extends AC lifespan and keeps efficiency high.